French Cast-on
A woman visiting our SnB group last week mentioned trying to do a French Cast-on. I must admit that she had me perplexed until we talked a bit, and it was just a fancy way of saying tubular cast-on, although I do prefer the name French Cast-on, and may have to use it from now on. This got me to googling it when I got home. Nothing new, except that I found this video by Eunny Jang:
Ignore the fact that her producers did not have her use 2 highly contrasting yarns so that it would be evident as to what she was doing. Normally I make a tubular cast on starting with a crochet chain where I pick up the requisite number of stitches needed in each of the bumps on the chain. I have shown that in the past in this post.
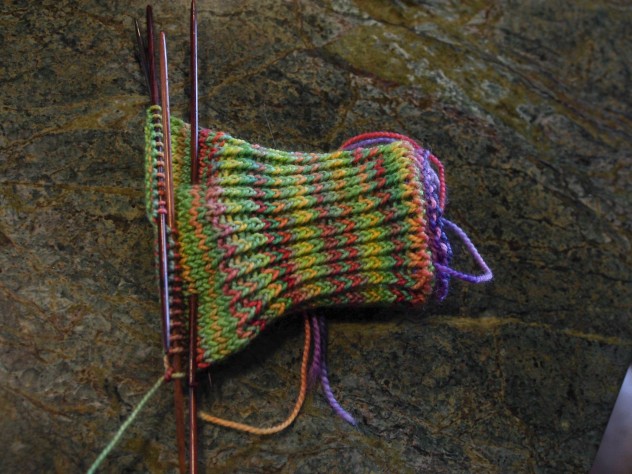
- What intrigued me about Eunny’s technique was that I could actually cast on 1/2 + 1 the final number of stitches needed in a contrasting color and just knit, (use a needle 1-2 sizes larger than you will end up knitting with. Here I used a size 3 don). I wanted to end up with 48 sts for my mittens, so I cast on up 25 + 1 = 25sts. I am only using 4 needles here, the stitches on 3, as there are so few to work with. Join in a circle (with the forever mentioned note: be careful not to twist your stitches), and knit 3-4 rows.
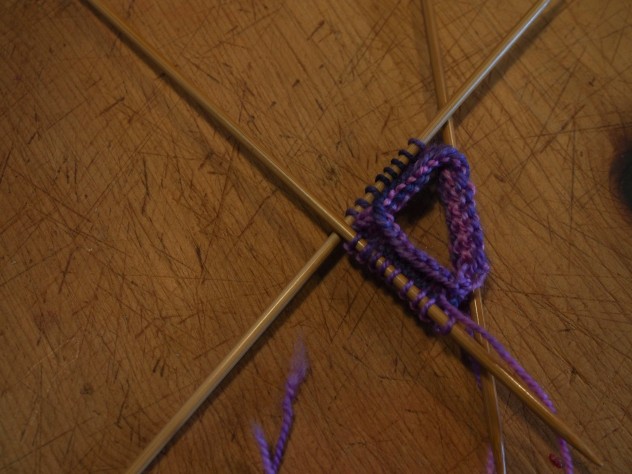


- knit for couple of rows, then start with your garment color and knit 3-4 rows still using the larger needles.

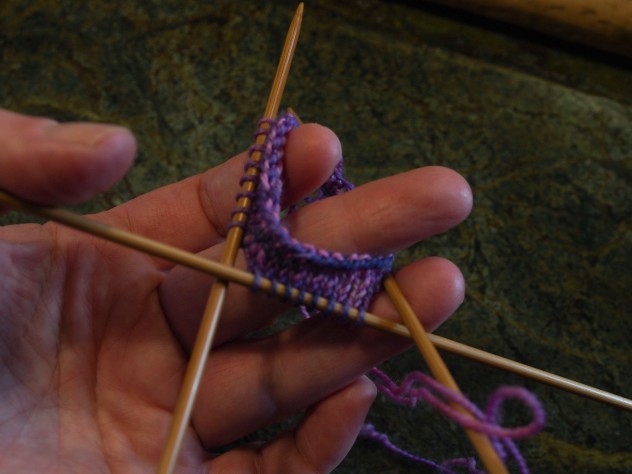
- Using the needle size that you will be knitting the socks with: *Knit the first stitch. For the second stitch, reach over the top of the knitting into the cast-on edge, and pick up the first “purl bump” of your sock yarn (not the contrasting color yarn that you cast on with), this is where using a clearly contrasting color such as I did really helps. Put it onto the left hand needle and purl that stitch.**
- Repeat from * to **, ending with a K1. You will now have your desired number of stitches plus one extra on your finished needle size, the first and last stitches will be knit stitches.

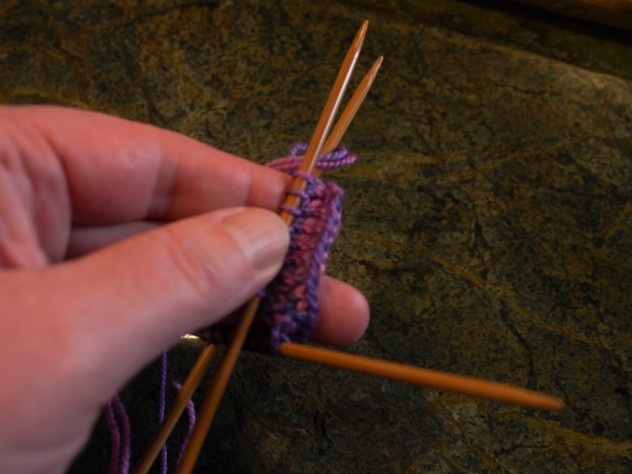
- Do 2-3 rows of 1×1 ribbing. On the first row knit the first and last stitch together. The stitch count will now match your pattern requirements. I am doing a twisted 1×1 rib here, using 5 size #1 dpn’s.
- After you have knit at least 3-4 rows, or anytime in the pattern progress that you feel like, it will be time to pull out the contrasting cast on yarn.
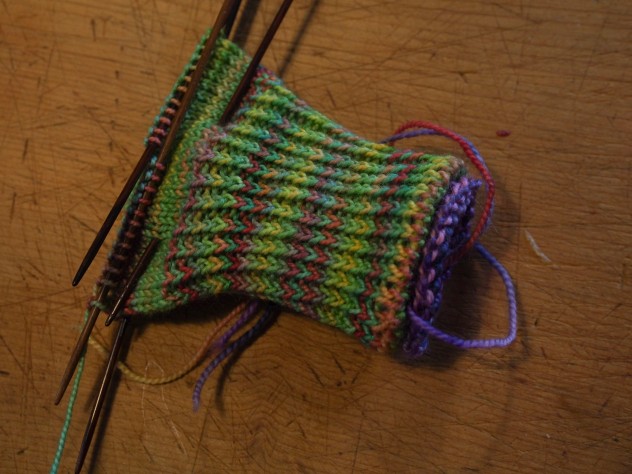
- You can clearly see here how the coast on yarn (purple) is now pulled underneath the fabric.

- It always helps to have a pair of Eiffel Tower scissors to trim with.
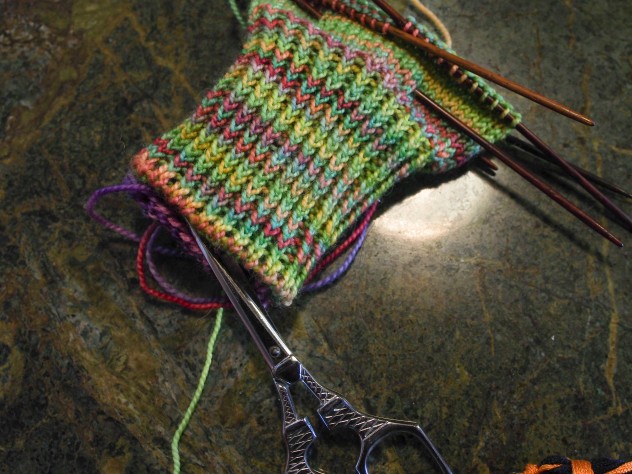
- Just cut a row or 2 into the cast on contrast yarn. Cut off the bottom cast on row(s).

- Pull out all of the cast on yarn
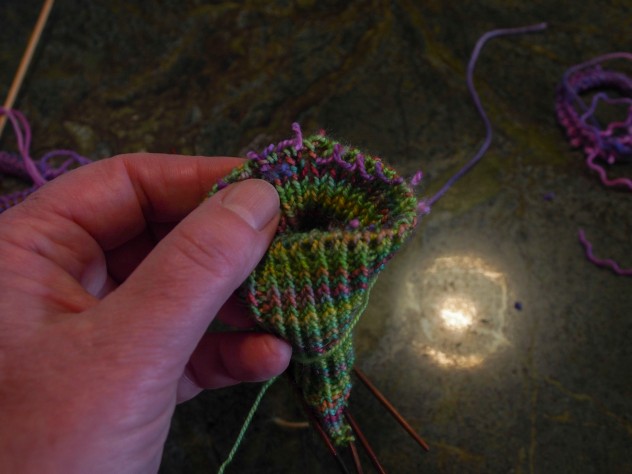
- And Voila! you have a beautiful finished edge that looks like the knitting just rolls over on itself.

- It is very stretchy, almost feels like the edge has elastic in it.

The key to making this work is to do the set up rows where you have 1/2 the number of stitches, in a larger size needle. Otherwise it will be very hard to pick up and not have the stretch that you are looking for.
Merci Beaucoup!

Helen 6:51 am on January 13, 2015 Permalink |
Thanks, I hadn’t thought to check out the tubular cast on and now I have to try this on the next pair of socks or mitts!
LikeLike
V o n n a 4:36 am on January 14, 2015 Permalink |
Seems awesome. Results I’d like to have, but honestly could not wrap my head around this. Perhaps 4:30 AM and NOT watching the video was to my disadvantage. I’ll comeback when brain cells want to learn a new knitting technique. 😉
LikeLike
knitting1105 3:50 pm on January 14, 2015 Permalink |
Please come back soon! Watch the video, then try a sample with very different colors so that you can clearly see the bumps. I think it will make sense when you are awake and can focus. Just do a practice swatch first. Let me know how it comes out.
LikeLiked by 1 person
V o n n a 4:26 pm on January 14, 2015 Permalink
Sure. Sounds like a plan. Question: can you use this cast on for any hat knit in the round?
LikeLike
knitting1105 7:57 pm on January 14, 2015 Permalink
You can cast on using this method for anything that has ribbing. 2×2 ribbing is a bit more fiddly, I will talk about that at a later date. I have used it on knitting that is not in a round. See this post where the bottom was knit back and forth prior to joining in a round. Or this one where I describe it in more detail, although using the crochet chain for the cast on.
LikeLiked by 1 person
V o n n a 8:16 pm on January 14, 2015 Permalink
Thanks I’ll go through everything and reread your post about the cast-on including watching the video before I cast on my hat to see if I’d like to try it on barley.
LikeLike